Knowledge Base
Search by either entering keywords or by selecting a product.
Configuring the software iSCSI initiator in an ESXi 5.x host using MPIO
NOTE: This procedure may require a reboot of the ESX host.
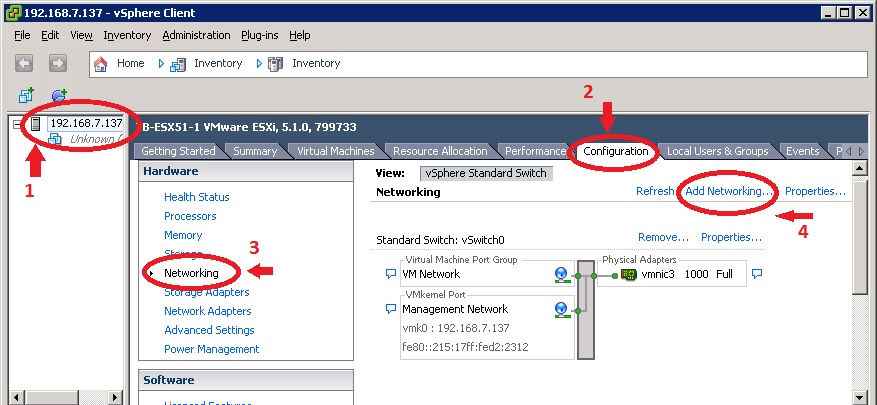
1. Open the Vshpere client and select the ESX host to configure.
a. Select the “Configuration” tab
b. In the “Hardware” section select “Networking”
c. on the far right, select “Add Networking”
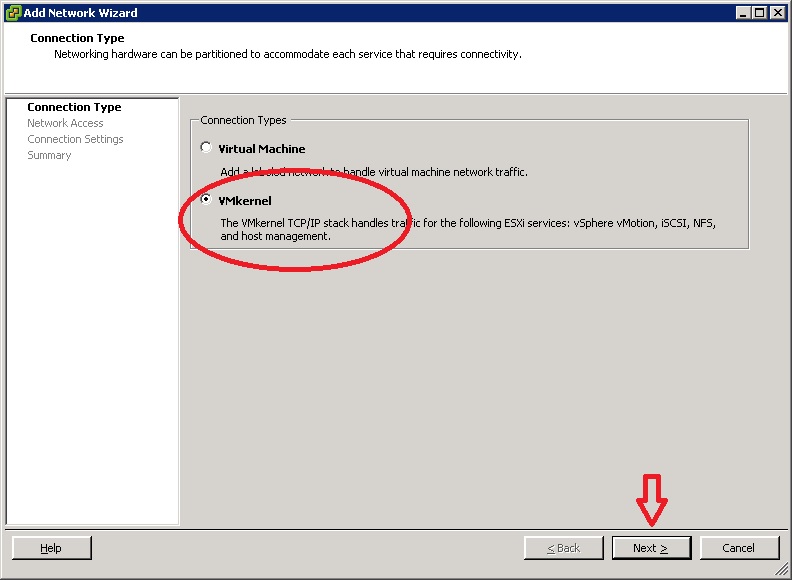
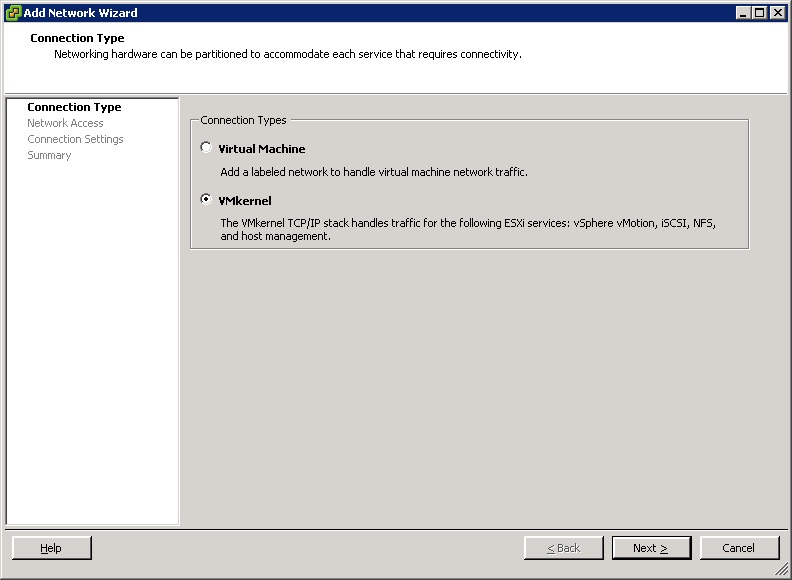
2. Select the radio button for “VMkernel” and click “Next”.
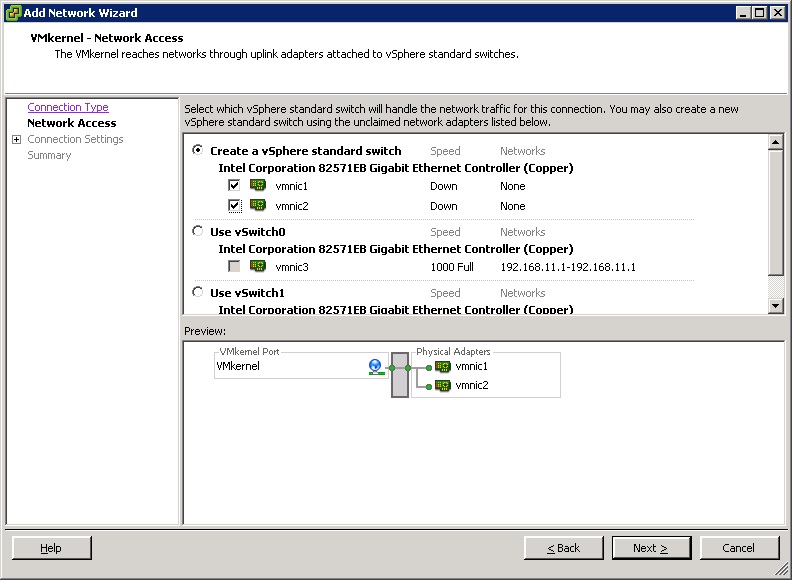
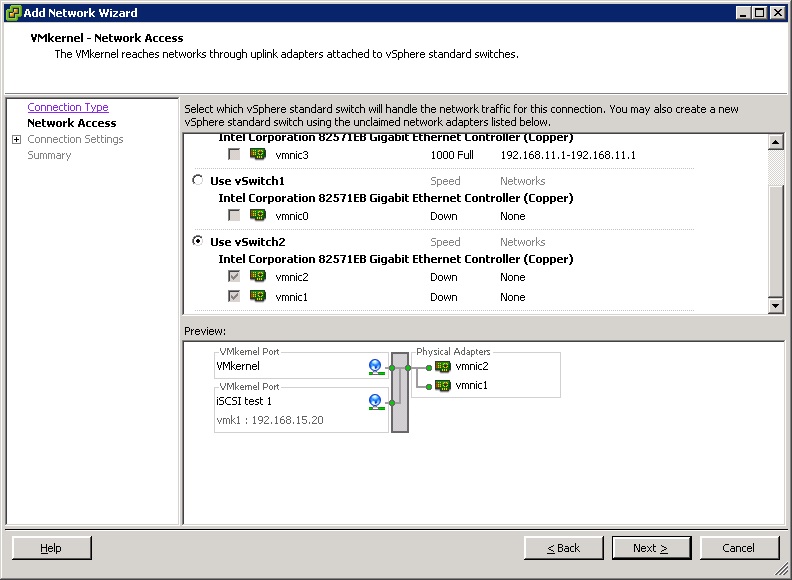
3. Each vmnic listed represents a physical network adapter on the host. Select the vmnics to be used for iSCSI. These should be not used by any other service. Then click “Next”. In this example we’ll use two NICs dedicated to iSCSI.
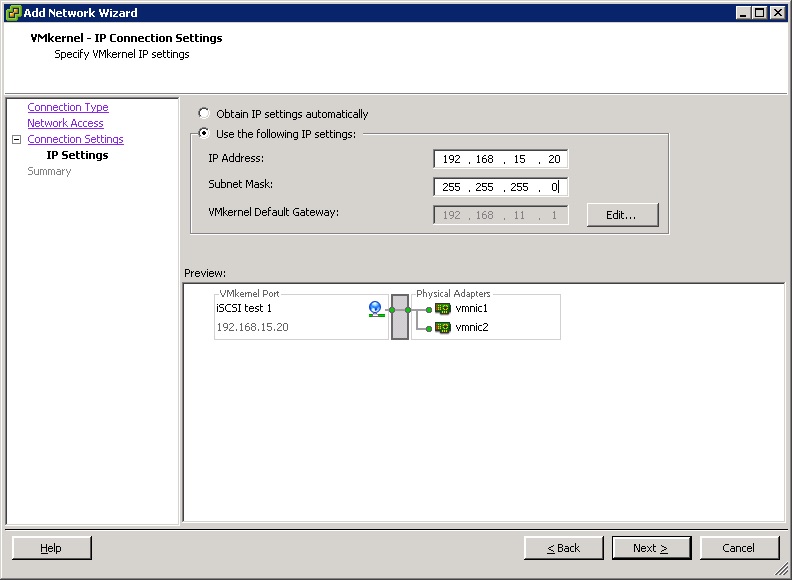
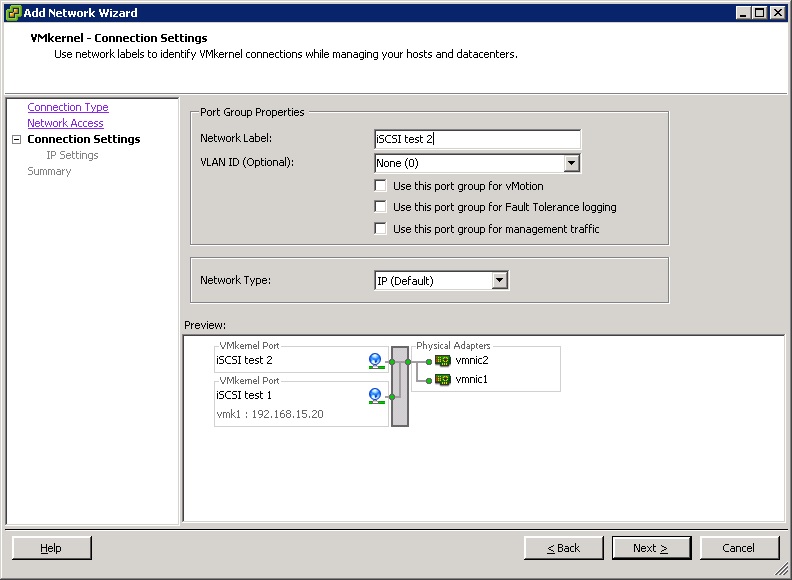
4. Give the VMkernel port a label. This should be something easily recognizable. Then click “next”.

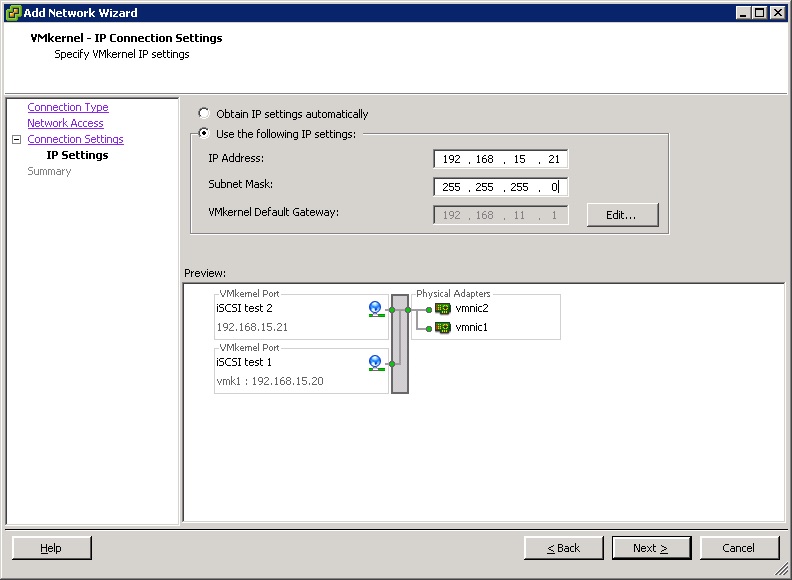
5. Assign an IP address and subnet mask to the VMkernel. This should be a static IP. Then click “Next”.
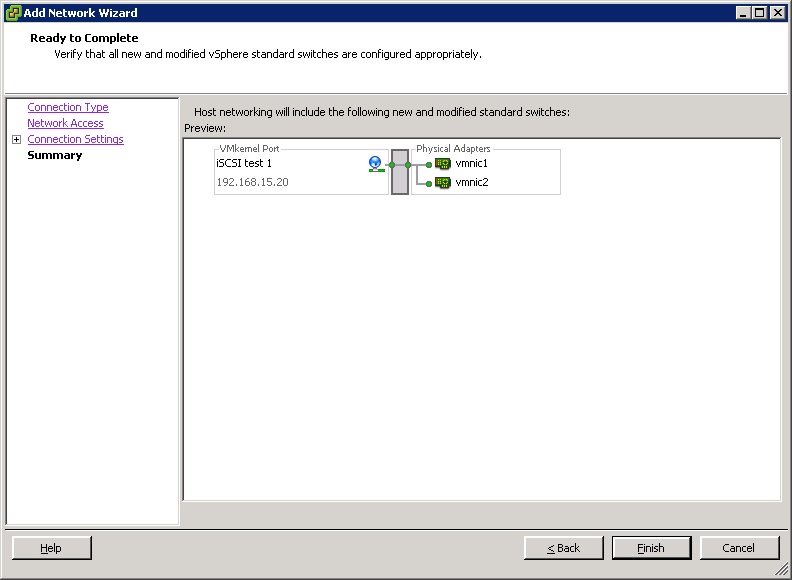
6. Verify that the VMkernel port name, the IP address and the vmnic are all correct, then click “Finish”.
7. From the configuration screen, click “Add Networking” again to add a second VMkernel port.
8. Select the radio button for “VMkernel” and click “Next”.
9. Select the vSwitch that was created earlier in this process and click “Next”.
10. Give this port a similar name to the previously created port and click “Next”.
11. Assign an IP address and subnet mask to this kernel port. This should be in the same subnet as the previously created port.
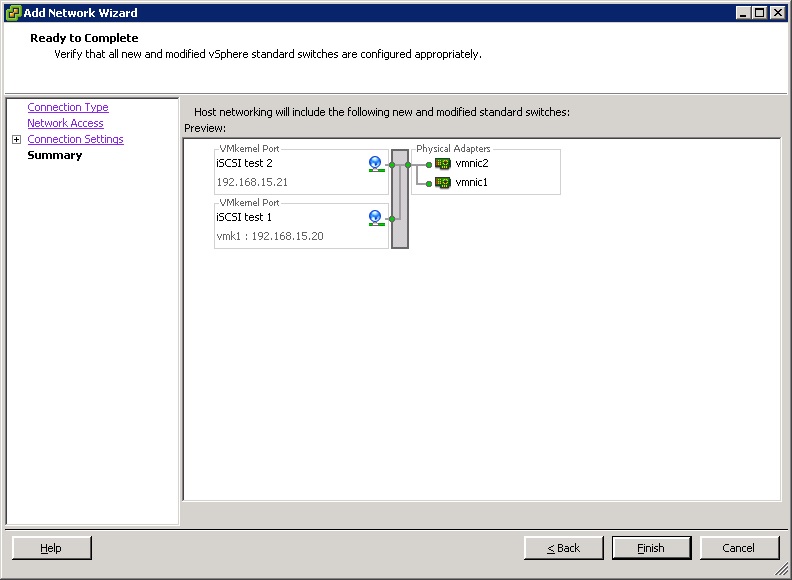
12. Verify that both kernel ports and NICs appear on the new vSwitch and click “Finish”.
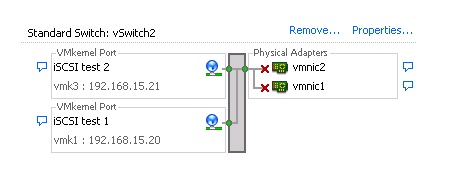
13. The new vSwitch should now appear in the networking configuration screen. Click “Properties” on the new vSwitch.
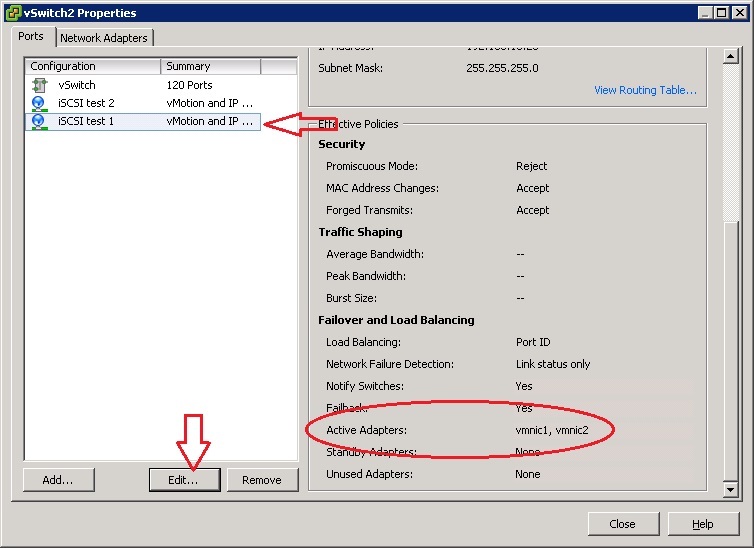
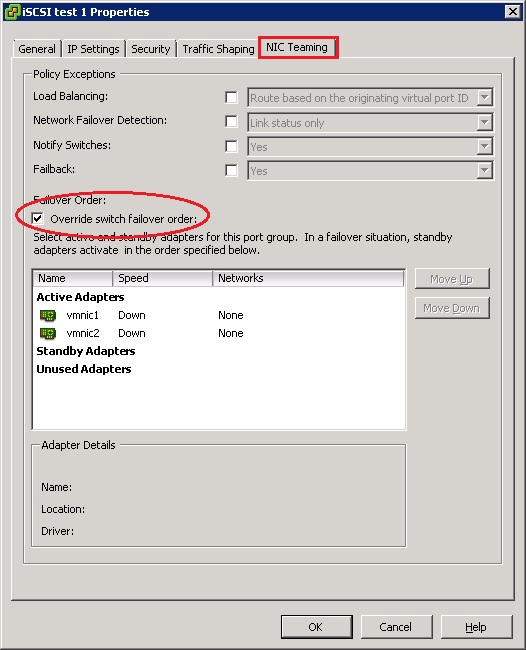
14. Select the first kernel port you created. Scroll to the bottom of the listing on the right and it should show both vmnics as active adapters for this port. Click the “Edit” button.
15. Select the “NIC Teaming” tab and check the box to “Override switch failover order”.
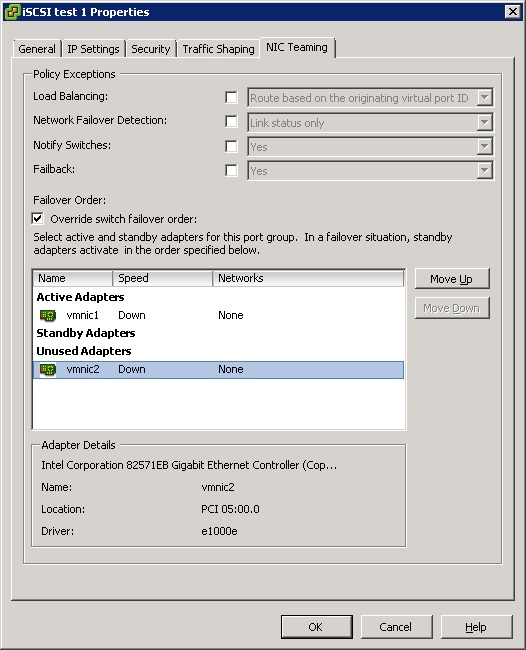
16. Select the second vmnic shown in the list and click the “Move Down” button until it is listed under “Unused Adapters”. Click “OK” to finish.
17. Select the second kernel port you created. Scroll to the bottom of the listing on the right and it should show both vmnics as active adapters for this port. Click the “Edit” button.
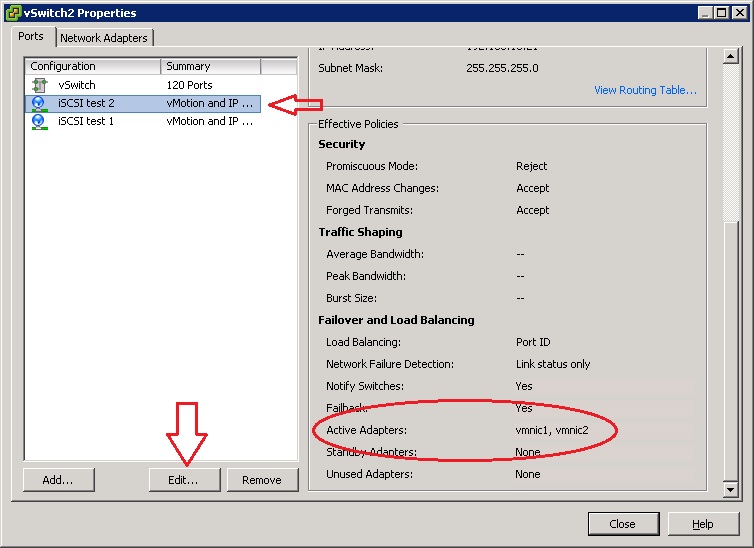
18. Select the first vmnic shown in the list and click the “Move Down” button until it is listed under “Unused Adapters”. Click “OK” to finish.

19. Select the first kernel port and scroll to the bottom of the description. It should now show the first vmnic as “Active” and the second vmnic as “Unused”.

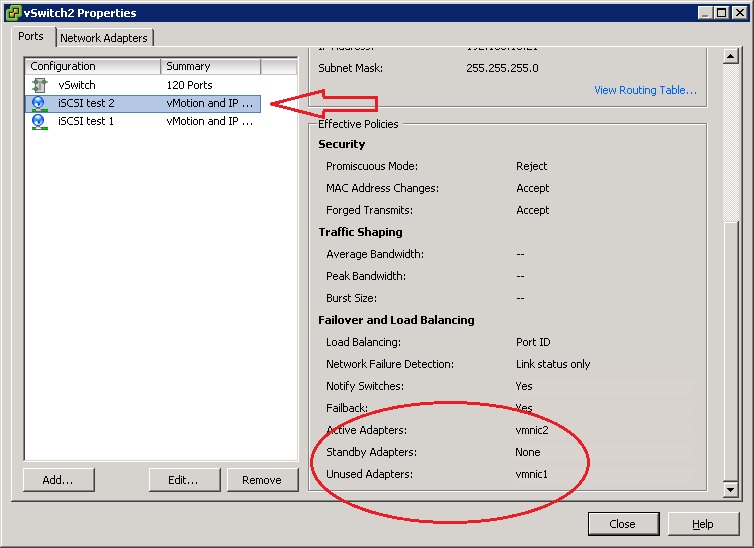
20. Select the second kernel port and scroll to the bottom of the description. It should now show the second vmnic as “Active” and the first vmnic as “Unused”.
NOTE: If the iSCSI software adapter is already enabled, skip to step 23.
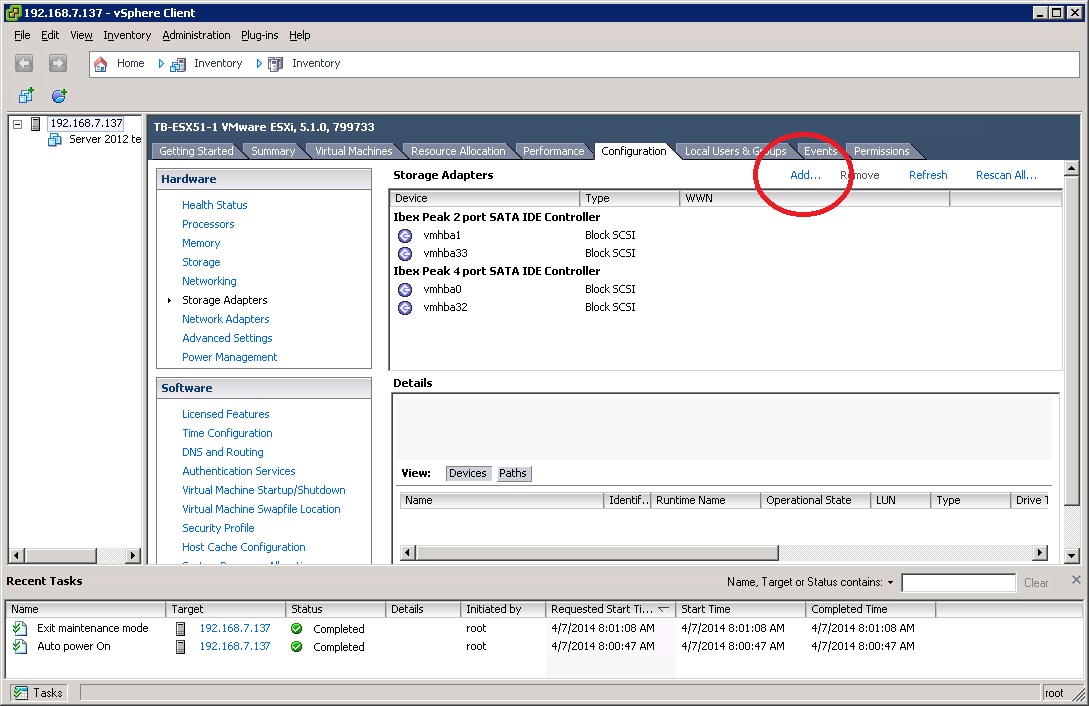
21. In the “Hardware” section select “Storage Adapters” section click “Add”.
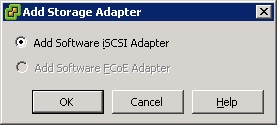
22. On this dialog box click “OK”.
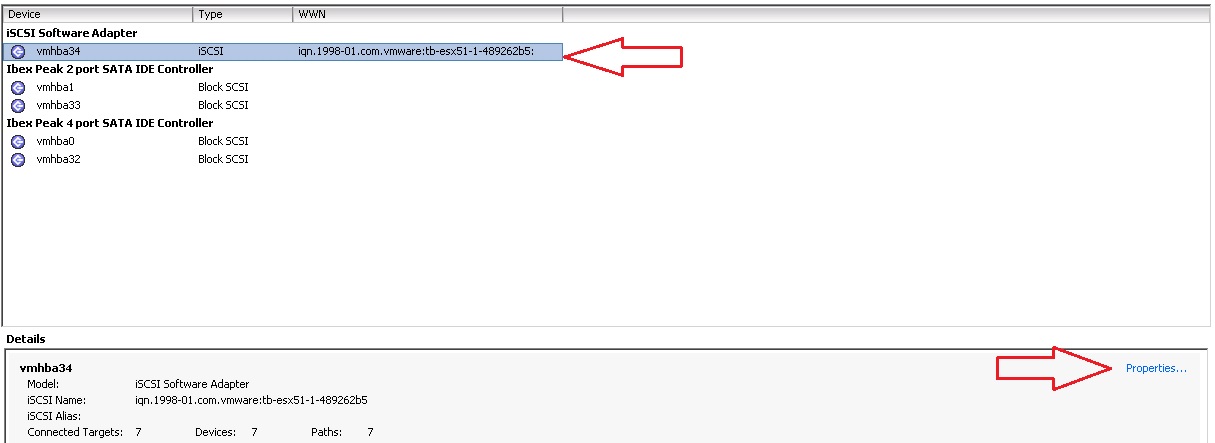
23. In the “Hardware” section select “Storage Adapter”. Make sure the iSCSI Software Adapter is selected and then click “Properties” on the right.
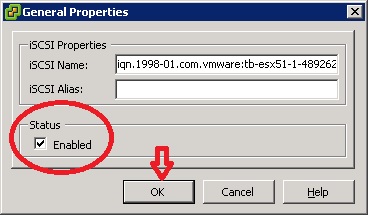
24. On the iSCSI Software Adapter property sheet, click “Configure” on the lower right.
NOTE: If the “Status” shows as “Enabled”, skip to step 27.
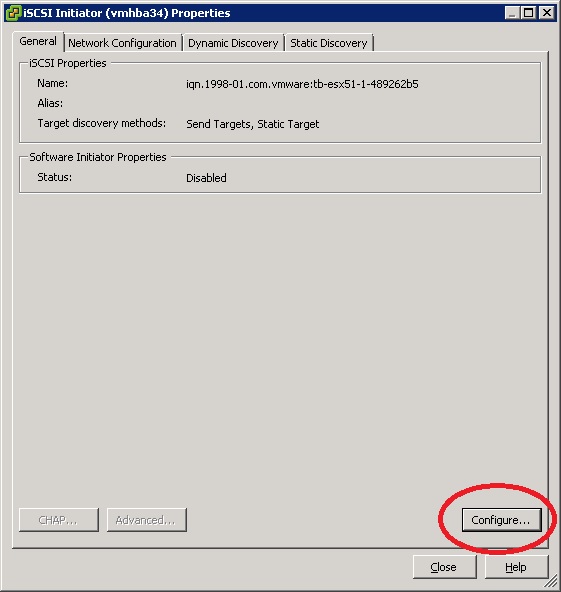
25. Select the checkbox to enable the adapter, then click “OK”.
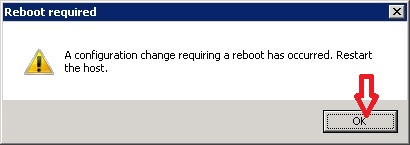
26. The reboot prompt may appear. Click “OK”. This will NOT initiate a reboot. The reboot must be done manually later in the process.
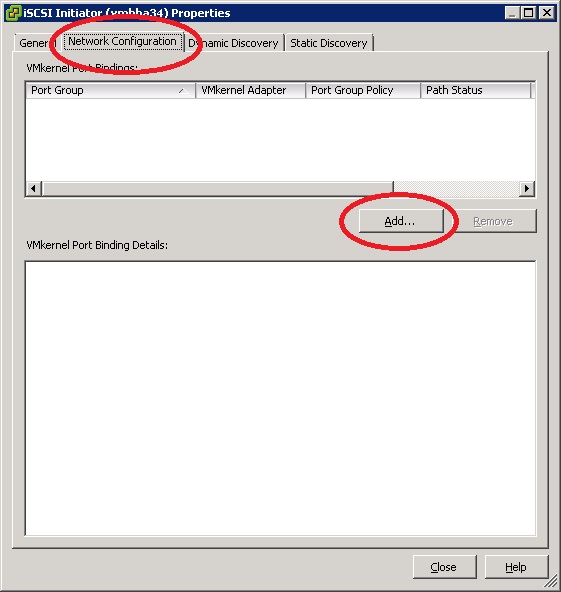
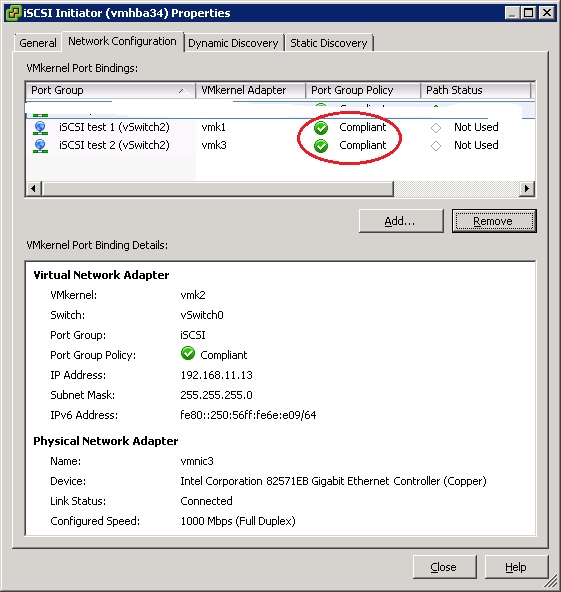
27. Select the “Network Configuration” tab and click “Add”.
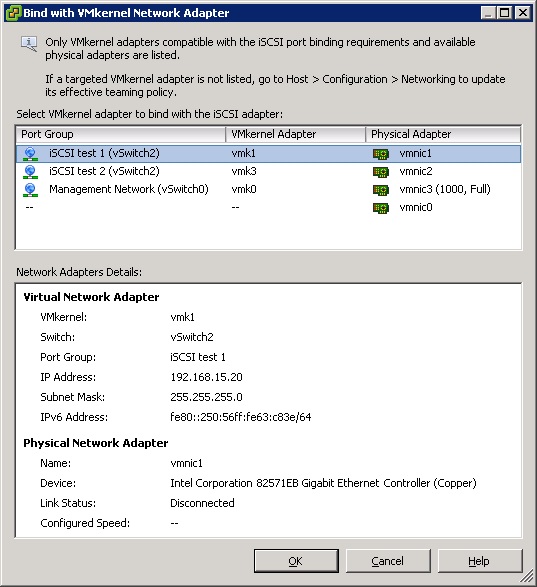
28. Select the VMkernel ports that were created earlier and click “OK”.
29. Verify that both ports show up and are listed as “Compliant”.
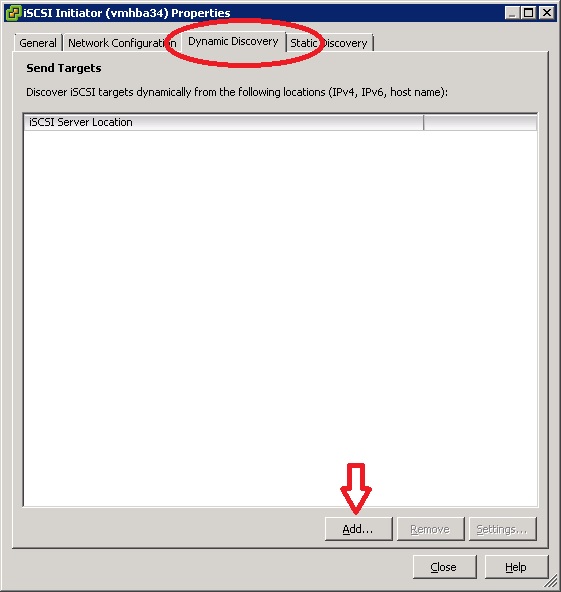
30. Select the “Dynamic Discovery” tab and click “Add”.
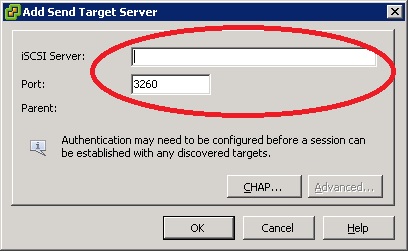
31. Type in the IP address for the TeraStation. Leave the port number at the default of 3260 and click “OK”.
NOTE: If the TeraStation has multiple IP addresses it is only necessary to add one of them to the discovery tab.
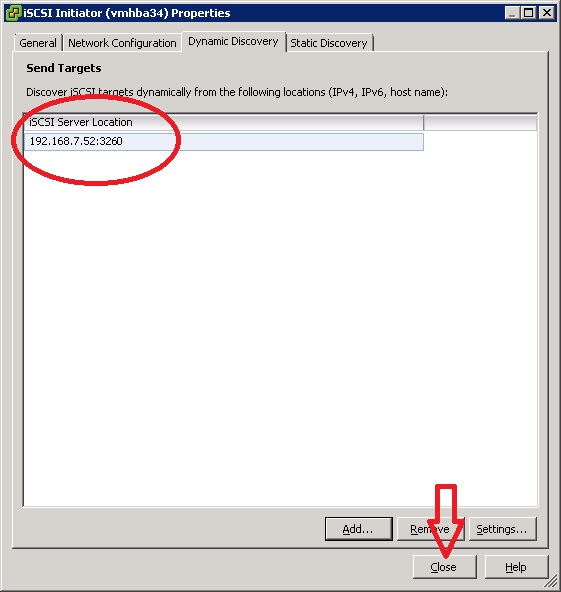
32. Verify that the correct IP address shows up in the window and click “Close”.
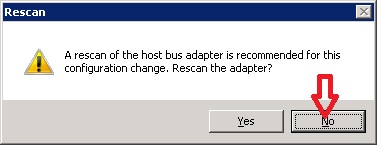
33. A dialog box should pop up requesting a rescan. Click “No”.
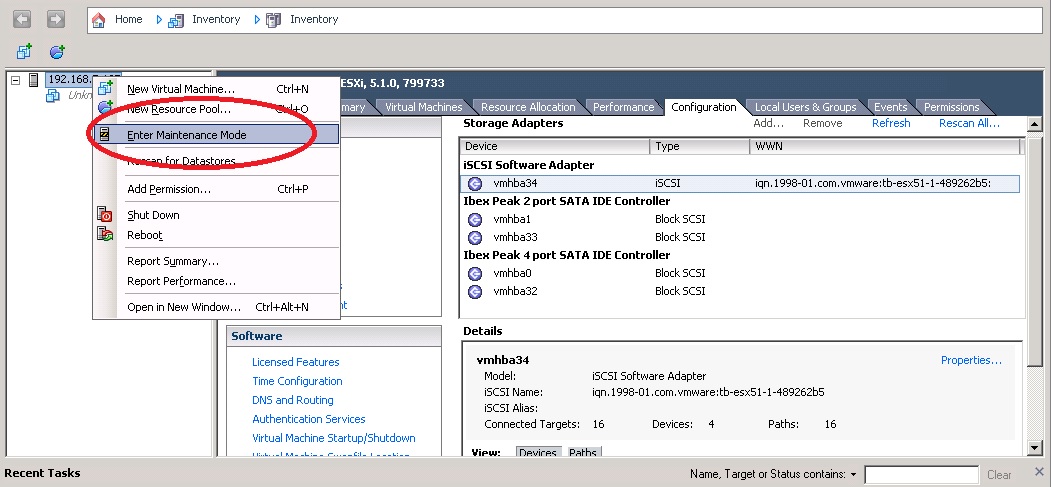
NOTE: If you received the reboot prompt earlier, at this point the host must be rebooted. Before an ESX host can be rebooted, it must first be put into maintenance mode. If you did not receive the reboot prompt, skip to step 39.
34. In the left column, right-click on the host and click “Enter Maintenance Mode”.
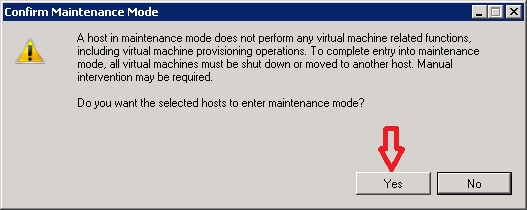
35. The “Confirm Maintenance Mode” dialog box will pop up. Click “Yes”.
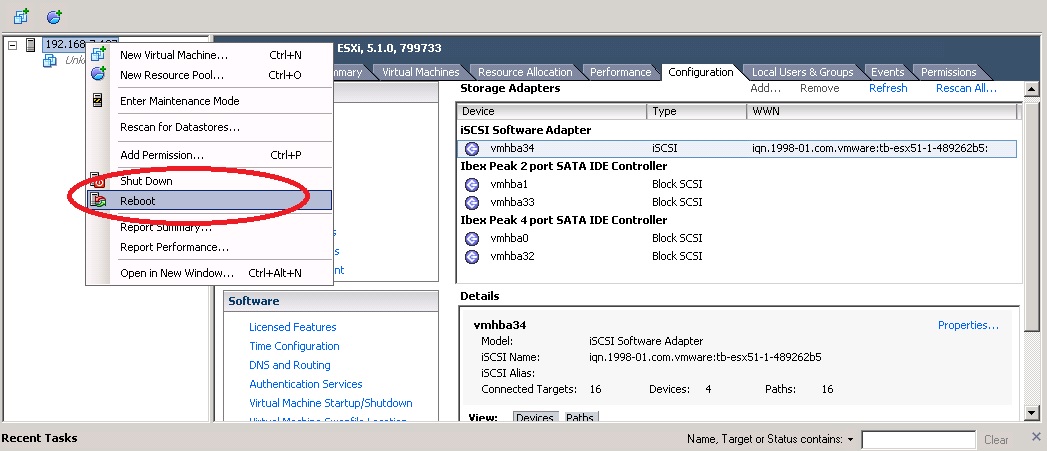
36. Right-click on the host again and select “Reboot”.
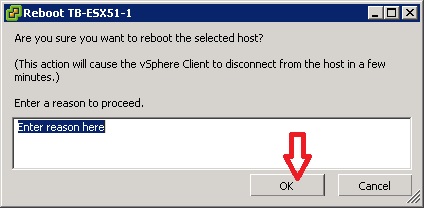
37. The reboot confirmation dialog box will appear. A reason for the reboot can be included here, but is not required. Click “OK”.
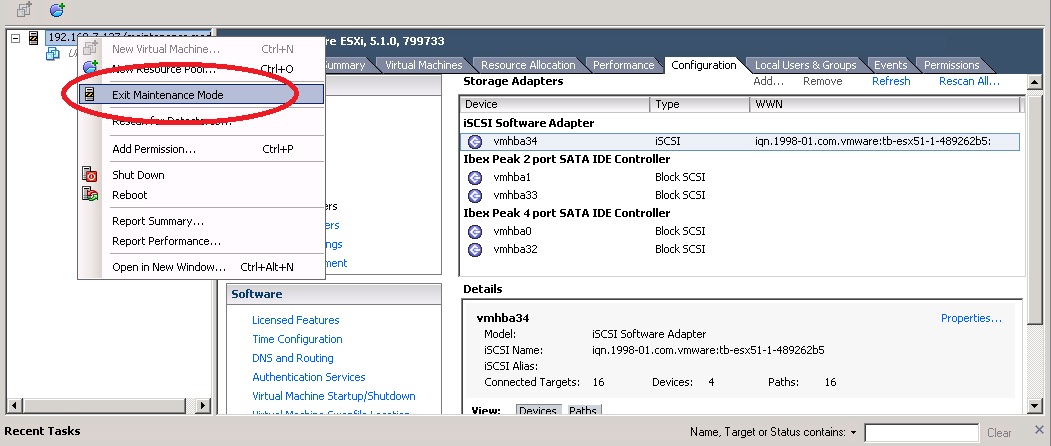
38. Once you are able to log back in to the Vshpere client, right-click on the host and select “Exit Maintenance Mode”.
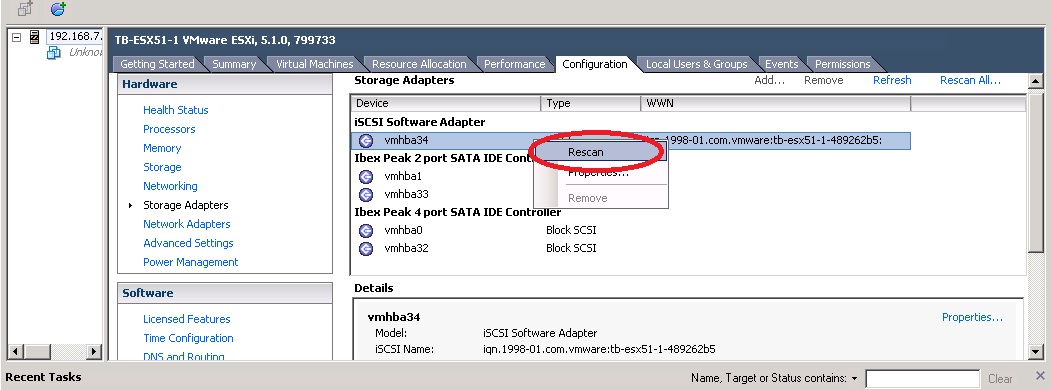
39. On the “Configuration” tab select “Storage Adapters”. Right-click the iSCSI Software Adapter and select “Rescan”.
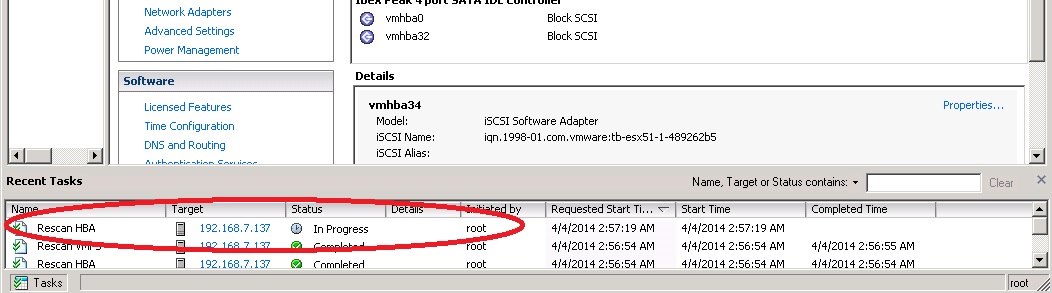
40. You should get a message at the bottom under “Recent Tasks” indicating that the “Rescan HBA” task is running. This can take 3-5 minutes. Please be patient.
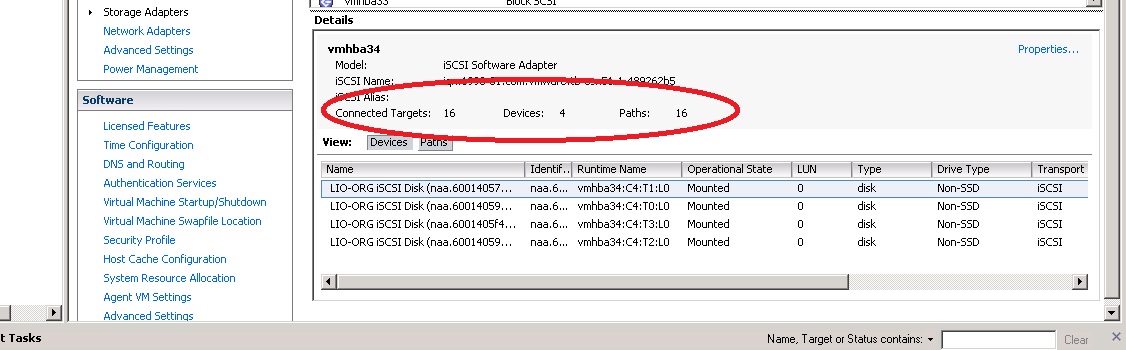
41. When the rescan is complete, you should see some connected targets and devices listed. The number of devices should equal the number of iSCSI volumes created on the TeraStation. The number of connected targets and paths should be identical to each other, but not necessarily match the number of Devices.
At this point iSCSI is working and connected. Now we’ll create a partition to store data. In ESX, this is referred to as a “Datastore”.
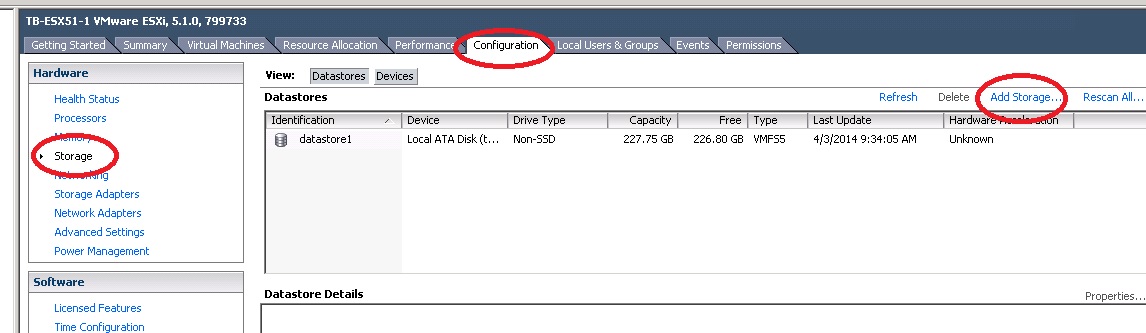
42. On the “Configuration” tab in the “Hardware” section select “Storage” and click “Add Storage”.
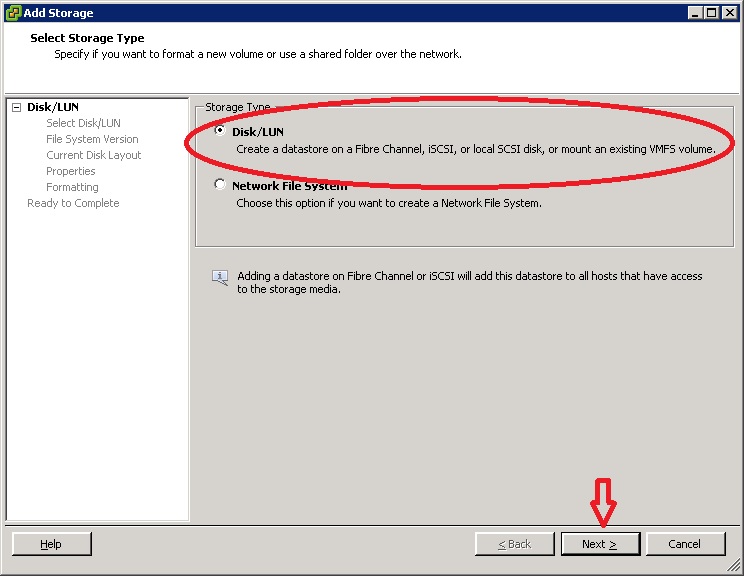
43. Select the radio button for “Disk/LUN” and click “Next”.
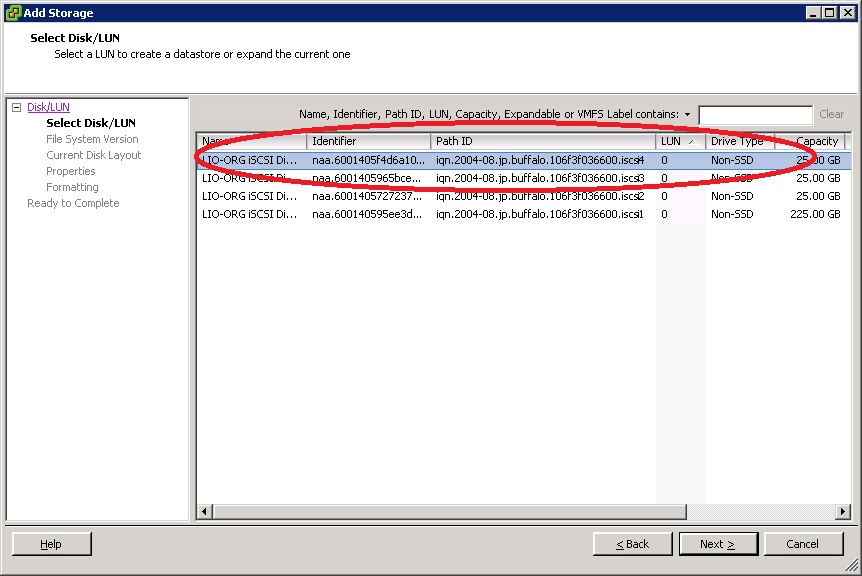
44. You should see all the available volumes that were created on the TeraStation listed here. Note that the “Path ID” ends with the name given to the volume on the TeraStation. Select the volume you want to use to create the datastore and click “Next”.
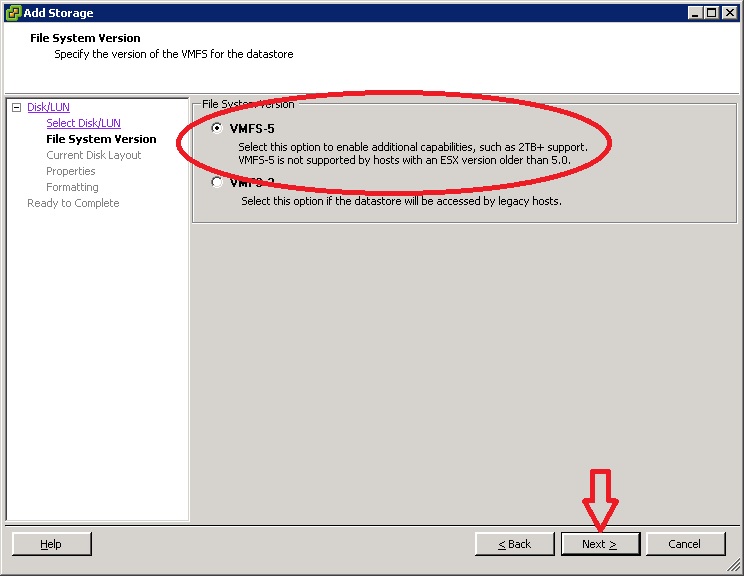
45. Unless you know for a fact that VMFS-3 is needed, select the radio button for VMFS-5 and click “Next” (VMFS is the VMware File System).
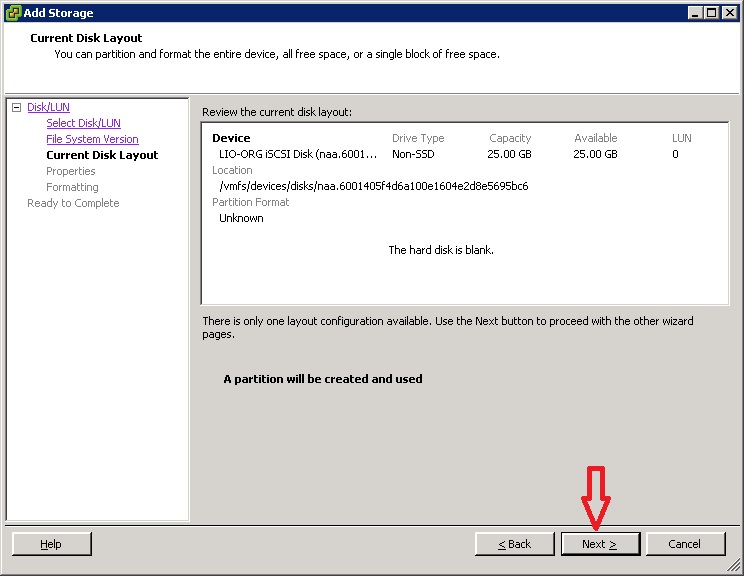
46. Verify that the information shown is correct and then click “Next”.
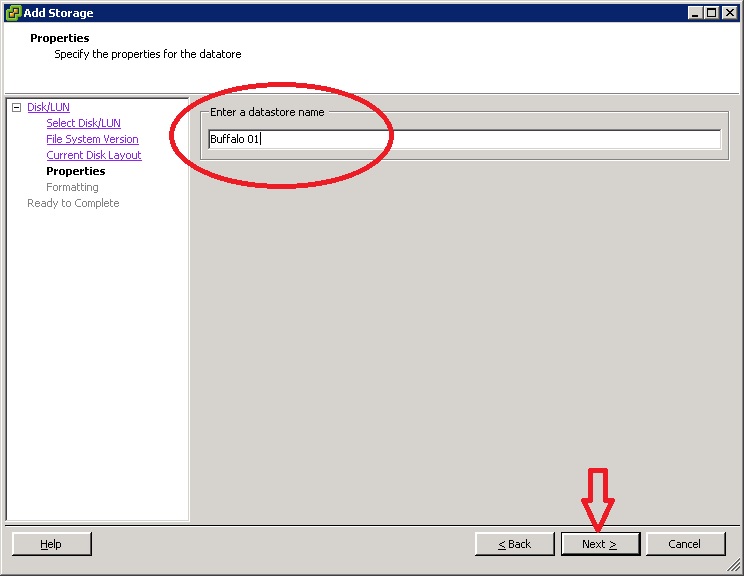
47. Provide a name for the datastore. This name is only used by the system administrator and is completely arbitrary.
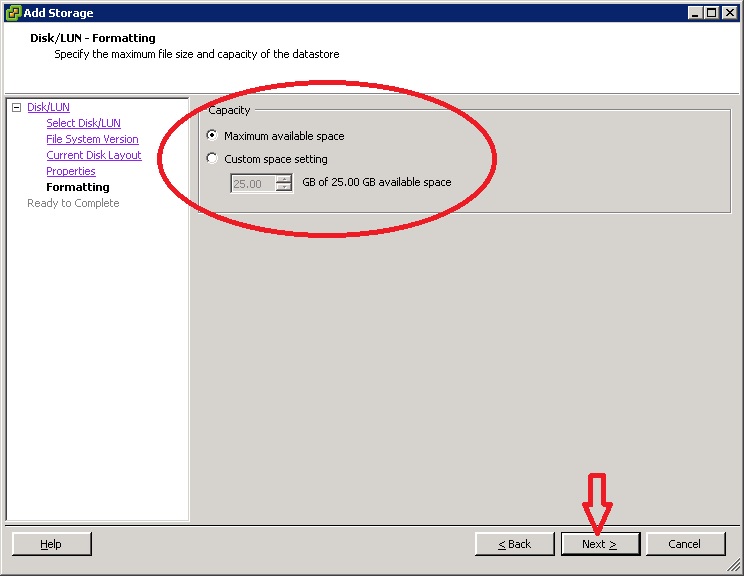
48. You can split a volume into multiple datastores, but it is recommended instead to create multiple iSCSI volumes on the TeraStation and use the maximum space for each datastore. Click “Next”.
49. Verify that the information shown is correct, then click “Finish”.
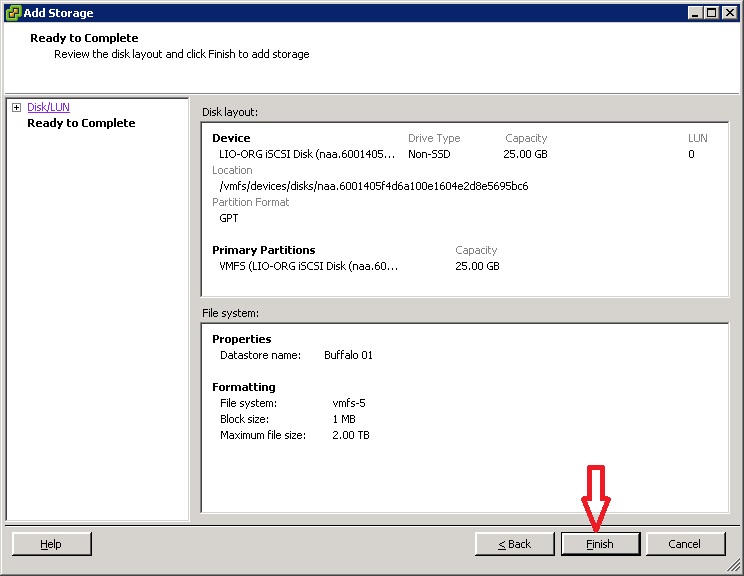
50. At the bottom of the screen under “Recent Tasks” you should see the “Create VMFS Datastore” task running. Depending on the size of the datastore, this could take several minutes.
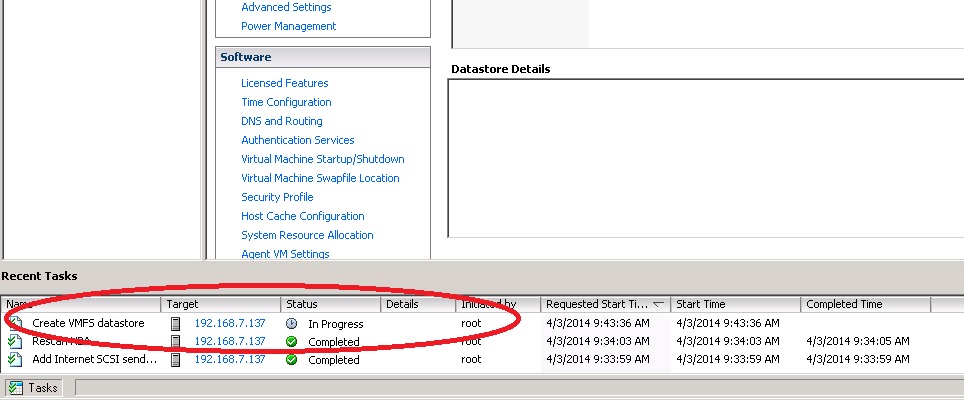
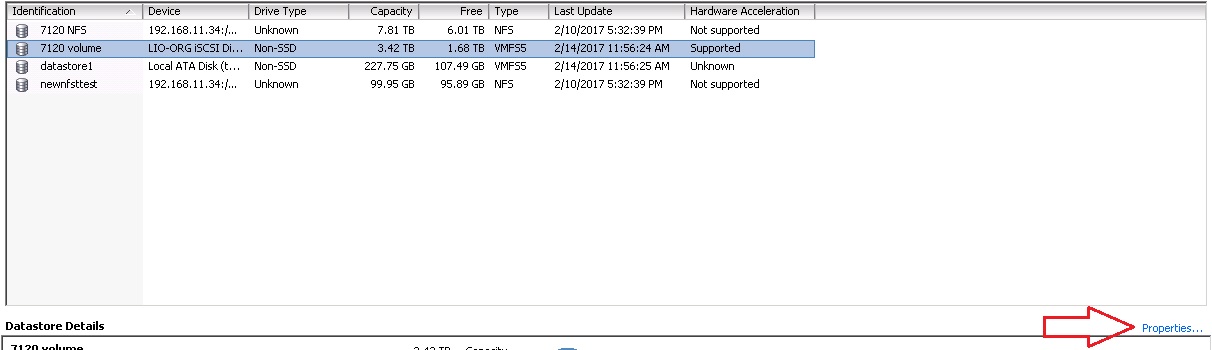
51. Once the task is complete, the new datastore should be listed on the “Configuration” tab in the “Storage” section.
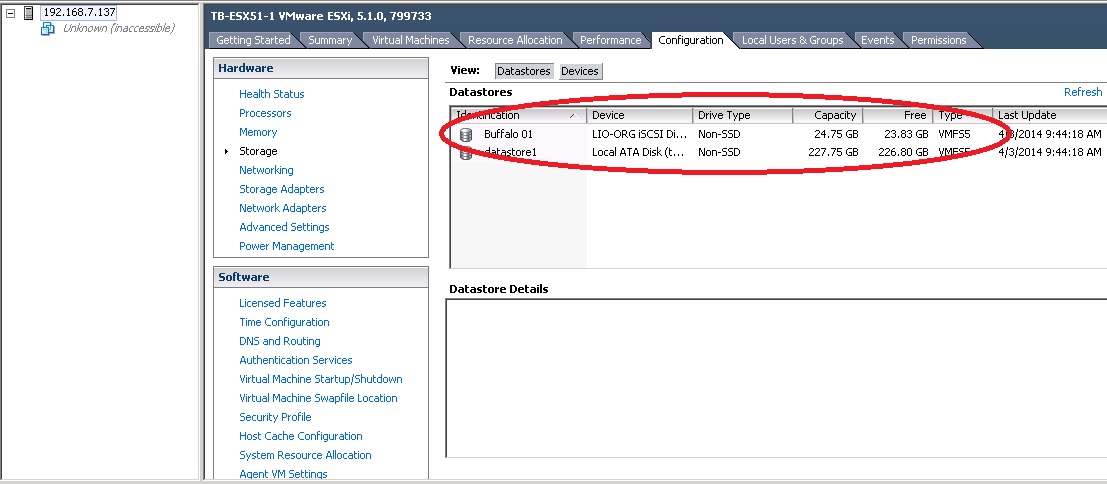
52. Select the new datastore and click “Properties”.
53. Click the “Manage Paths” button.

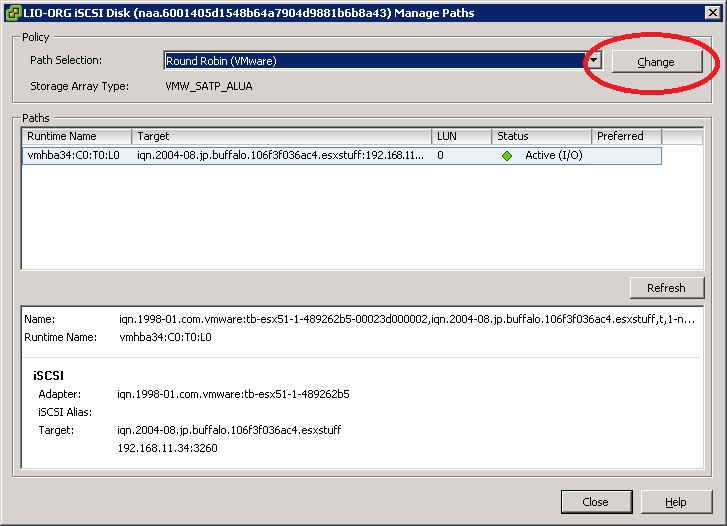
54. From the drop-down menu select “Round Robin (VMware).
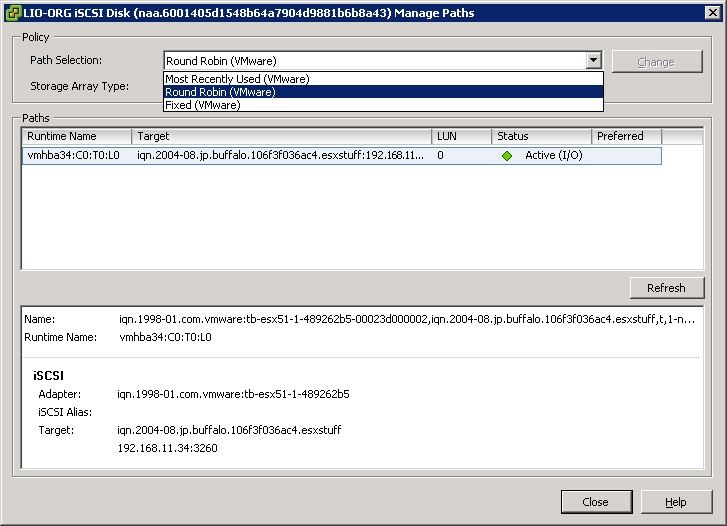
55. You MUST click the “Change” button to apply the changes! Once you click “Change” click the “Close” button to exit.
At this point the datastore is ready to use with multipath correctly enabled for best performance.