Knowledge Base
Search by either entering keywords or by selecting a product.
Configuring a RAID array on a Buffalo Linkstation
Note: This procedure will delete any data currently on the LinkStation!
- Access Settings, the Linkstation's web user interface, by entering the current IP address of the unit into a web browser. If the current IP is unknown the unit can be located using NAS Navigator. If NAS Navigator is not installed, download and install the application by clicking here.
- Click on the "Advanced Settings" tile.

- Click the "Drives" tab on the left, then click on the widget to the right of "RAID".

- In this example, there is no RAID array configured. If there is an existing array you wish to change, you will need to delete it first. Note that this will delete any data on the array. For this example, click Array1.

- On the RAID configuration screen, click on the "RAID Mode" drop-down menu to select the RAID type you wish to use. Each RAID type provides different strengths and weaknesses. For more information on RAID levels please read this.

- In this example, we are using a two-drive LinkStation model. For four-drive units there will be additional RAID types allowed. Here we have the option of RAID 0 or RAID 1. RAID 0 provides more usable space and better performance but has no data redundancy. If a drive fails in a RAID 0 array all the data stored on the array is lost. RAID 1 is a mirror set. It will have half the usable space and will be a bit slower, but if a drive fails the data can still be accessed. In our example we're going to use RAID 1, which is the default configuration.
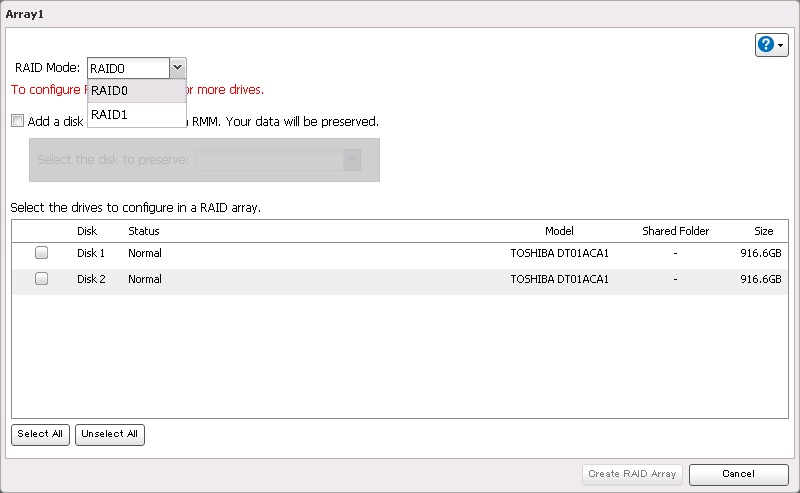
- After you select the RAID type, select the drives that you wish to add to the RAID array. In a two-drive unit like the one in this example you should select both drives. In a four-drive unit you could create two RAID 1 arrays, but normally you would create a RAID 5, 6, or 10 array using all four drives. Again, reference the link above for a more complete description of different RAID types. Once you have the parameters set as you want them, click Create RAID Array.

- When the following dialog appears, click Yes.

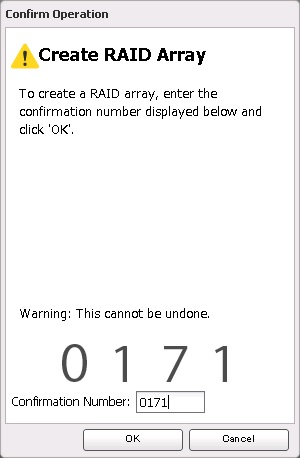
- You will be asked to enter a randomly-generated four digit code to confirm the action. The screen below is only an example. Enter the code given by your unit and click OK.
- The unit will take a few minutes to create the array. Once the process is finished the following dialog should be displayed. Click OK.

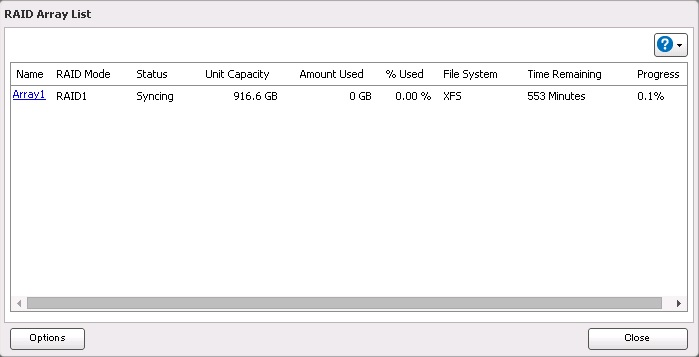
- The new array should now be listed. The status will be displayed as "Syncing" with a progress indication to the right. You will now need to create one or more shared folders on the unit.