Knowledge Base
Search by either entering keywords or by selecting a product.
Configuring Backup on a Buffalo TeraStation
Applies to TeraStation 5000/3000/7000 series
For other models, please visit this article.
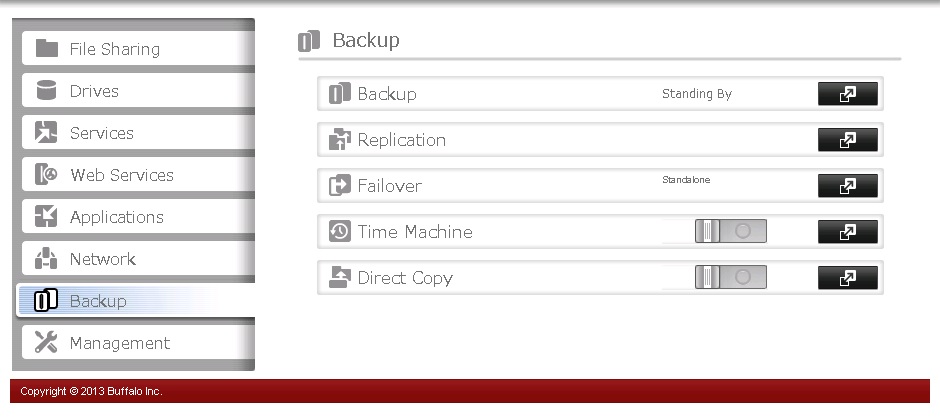
- Access Settings, the TeraStation GUI and click on the "Backup" tab on the left. Then click on the configuration icon to the right of the "Backup" option.

- Click Create New Job to create a new backup job.

- Give the job a name and select a schedule.
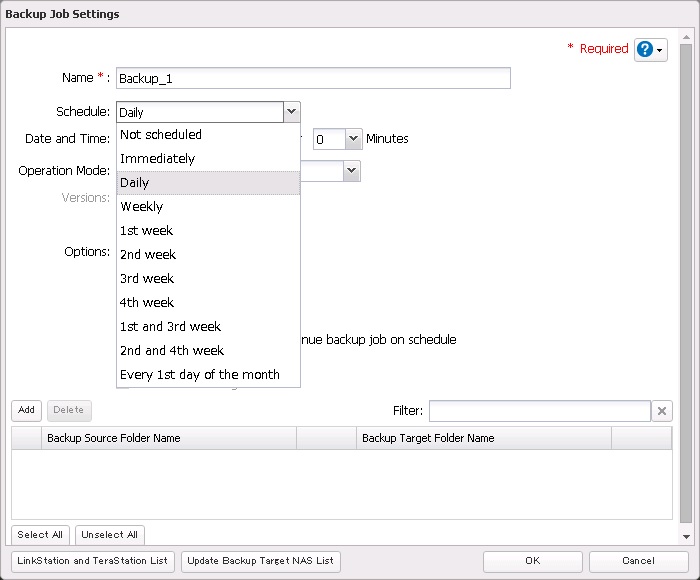
- Select the "Operation Mode" (backup type).

The following types of backup jobs may be selected:
Type
Files included
Normal backup
All files in the source will be backed up to the destination. You can specify how many backup versions to keep from 1–400, or select "Unlimited" to keep all backups until the drive is full. If a specific number of backup versions is specified, the backup destination folder should be on the same TeraStation that the backup job is configured from, or on an external USB drive attached to that TeraStation.
Overwrite (incremental)
The first time the backup job runs like a normal backup. In subsequent backups, files added to the source as well as files deleted from the source are kept in the backup folder.
Overwrite (differential)
The first backup job runs like a normal backup. As each additional backup job runs, files are added to and deleted from the backup folder. The backup destination folder is always the same size as the backup source folder.
Management backup
Each time a backup is executed, management information is stored, and only files that have changed are copied or deleted. Data is retrieved from the previous backup file for files that were not changed. This is useful for making backups with limited space or for referencing status at a particular point in time (for use for data snapshot applications). The destination folder for a management backup must be a local folder on this TeraStation or on a USB drive attached to it. The target folder will be set to read-only. Do not use folders from drives formatted with FAT.
You can specify how many backup versions to keep from 1–400, or select "Unlimited" to keep all backups until the drive is full. If a specific number of backup versions is selected, the backup destination folder should be on the same TeraStation that the backup job is configured from, or on an external USB drive attached to that TeraStation.
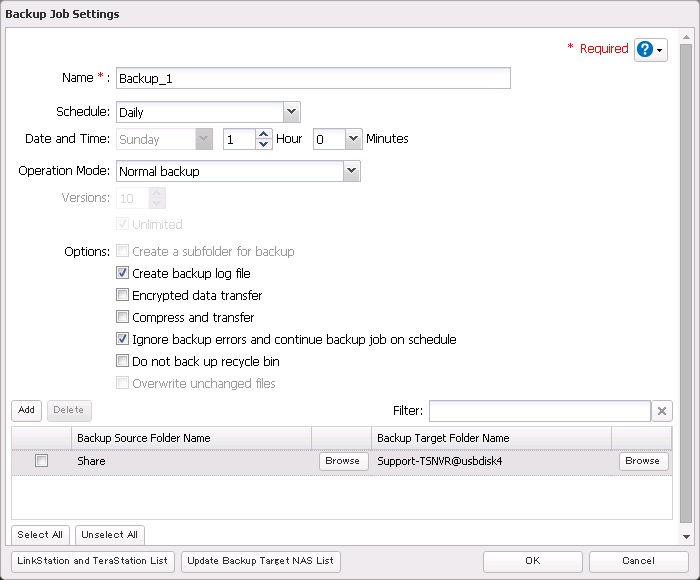
- Select other options as desired. Default settings are shown. Click Add to add a source and destination folder for the backup.

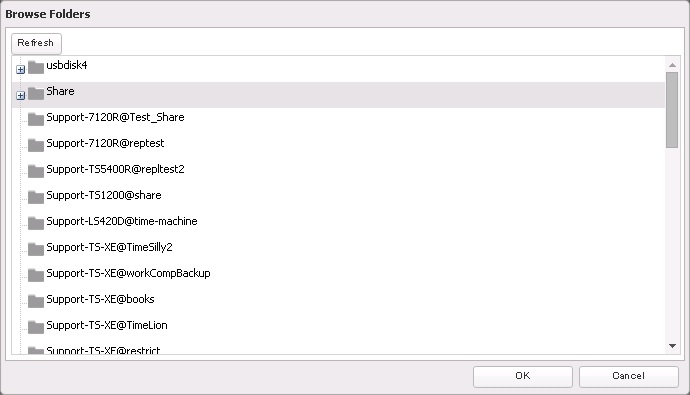
- Click Browse under "Backup Source Folder Name" to select the folder to be backed up.

- Select a local folder to back up. In this case, we're selecting the default share.
- Click Browse under "Backup Target Folder Name" to select the destination for the backup.

- Select the target. The target can be a local folder or a folder on a different TeraStation or LinkStation. In this example we're going to use a USB drive attached to the local TeraStation.

- Verify that all settings are accurate. Additional source and destination folders can be added to run as part of the same backup job. Once all options are set up as desired click OK save the backup job.
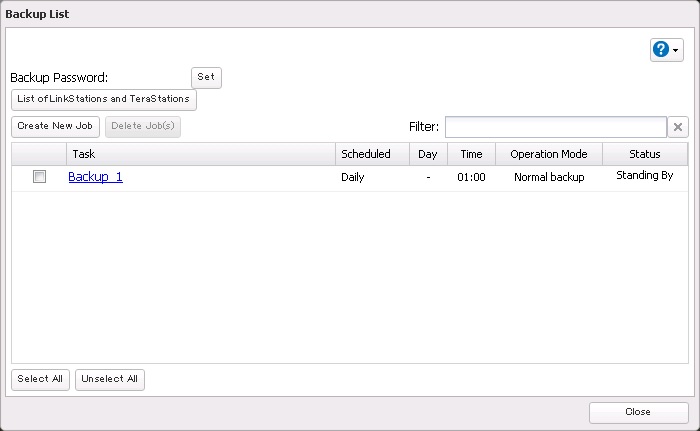
- The job will now appear in the list of backup jobs. This job can be edited later or additional backup jobs can be created. The type and status of the backup job is also shown in this list. In this case the job is "Standing By" because it was set run at 1:00 AM on a daily basis. Click Close to return the basic GUI.
- You will notice on the "Backup" line, is the backup status. The backup configuration is now complete.